스프링 개발 기초에 대해서 알아보겠습니다.
1. 정적 컨텐츠
2. MVC와 템플릿 엔진
3. API
3가지 방법에 대해서 알아보도록 하겠습니다.
1. 정적 컨텐츠
스프링 부트 정적 컨텐츠는 resources/static/ 경로에 html 파일을 하나 만들어 줍니다.
resources/static/hello-static.html
<!DOCTYPE HTML>
<html>
<head>
<title>static content</title>
<meta http-equiv="Content-Type" content="text/html; charset=UTF-8" />
</head>
<body>
정적 컨텐츠 입니다.
</body>
</html>
해당 파일을 만들고 실행 후, http://localhost:8080/hello-static.html 으로 접속해봅니다.
http://localhost:8080/hello-static.html
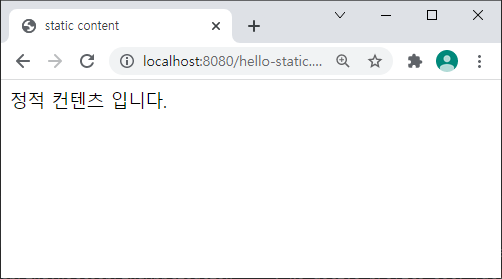
html로 만든 소스코드를 http://localhost:8080/hello-static.html 으로 볼수있습니다.
2. MVC와 템플릿 엔진
MVC 는 Model, View, Controller 입니다. 먼저, Controller를 만들어줍니다.
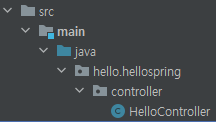
main/java/hello.hellospring/ 패키지 아래에, controller패키지를 하나 추가하고 HelloController를 생성했습니다.
HelloController
@Controller
public class HelloController {
@GetMapping("hello-mvc")
public String helloMvc(@RequestParam("name") String name, Model model) {
model.addAttribute("name", name);
return "hello-template";
}
}
@Controller 어노테이션으과 HelloController 를 만들어줍니다.
@GetMapping 어노테이션 안의 String 값을 URL 주소로 들어가게 됩니다.
@GetMapping 으로 만든 메서드의 리턴값을 가지고 templates 파일명을 찾기 때문에 정확하게 입력해야합니다.
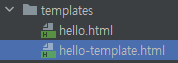
templates에 hello-tmplate.html을 하나 생성합니다. 내용은 아래와 같이 입력합니다.
소스 코드
<html xmlns:th="http://www.thymeleaf.org">
<body>
<p th:text="'템플릿의 html 입니다. ' + ${name}">empty</p>
</body>
</html>
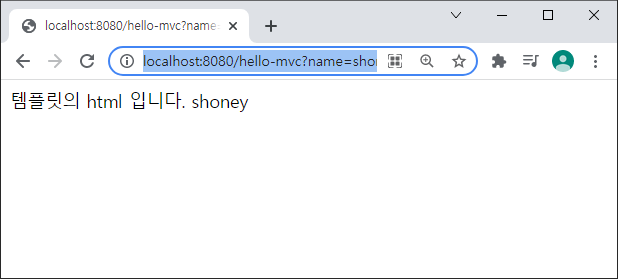
이번에는 @GetMapping에서 입력했던 hello-mvc를 입력하고, ?(물음표)로 name에다가 shoney라는 값을 집어 넣어줍니다.
http://localhost:8080/hello-mvc?name=shoney
@RequstParam은 어떤 값을 받아올지를 정하는 어노테이션입니다. @RequstParam에 name이라고 지정했기 때문에, URL 주소에다가 name=shoney라고 입력하면, name 키에 shoney 값이 들어가게 됩니다.
결과
3. API
@ResponseBody 를 통해서 바디에 값을 직접 넣어주는 방식이다.
HttpMessageConverter 가 객체는 JSON, 문자는 String으로 반환해준다.
3-1. API : 문자 반환
HelloController에 아래 내용을 추가한다.
소스 코드
@GetMapping("hello-string")
@ResponseBody
public String helloString(@RequestParam("name") String name){
return "hello "+ name;
}
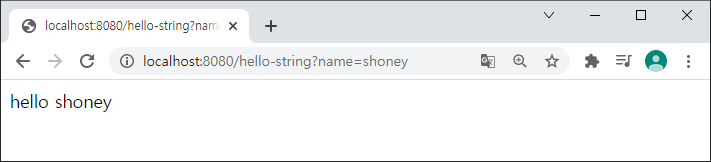
위 소스코드 입력 후 실행해보면, 아래와 같은 결과를 가진다.
결과
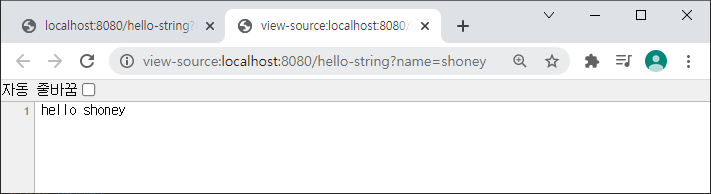
우클릭 후 소스코드 보기를 하면, String 값이 들어가 있는것을 확인할 수 있다.
소스코드 보기 결과
3-2. API : 객체 반환
HelloController에 아래 내용을 추가한다.
소스 코드
@GetMapping("hello-api")
@ResponseBody
public Hello helloApi(@RequestParam("name") String name,@RequestParam("age") Integer age){
Hello hello = new Hello();
hello.setName(name);
hello.setAge(age);
return hello;
}
static class Hello{
private String name;
private Integer age;
public Integer getAge() {
return age;
}
public void setAge(Integer age) {
this.age = age;
}
public String getName(){
return name;
}
public void setName(String name){
this.name=name;
}
}
실행하기 위해서는 'http://localhost:8080/hello-api?name=shoney&age=30' 으로 입력한다.
결과

객체가 반환되어야 하는데, JSON이 반환된 것을 확인할 수 있다.
이처럼 @ResponseBody를 사용하면, 문자일 경우 String으로, 객체일 경우 JSON으로 반환해주는 것을 확인할 수 있다.
'Back-end > Spring' 카테고리의 다른 글
| [InelliJ] 클래스에서 테스트 만들기 단축키 (0) | 2021.11.01 |
|---|---|
| [Spring] 스프링부트 테스트 케이스 실행하는 법(IntelliJ) (0) | 2021.10.27 |
| [Spring] gradle 빌드, jar 실행하는 방법 (0) | 2021.10.25 |
| [Spring Boot] 윈도우에서 실행중인 jar 종료 (0) | 2021.10.24 |
| [Java] 자바 11 설치하기 (1) | 2021.10.19 |