REST API Level3을 위한 HATEOAS 설정

버전별 차이가 있음

스프링 2.2 이상의 버전이기 때문에, 아래와 같이 소스코드 작성했다.
@GetMapping("/users/{id}")
public EntityModel<User> retrieveUser(@PathVariable int id) { //알아서 인티저로 변경해서 사용하려면 형을 정확하게 입력해ㅝ야함
    User user = service.findOne(id);

    if (user == null) {
        throw new UserNotFoundException(String.format("ID[%s] not found",id));
    }

    // HATEOAS
    EntityModel<User> model = EntityModel.of(user);
    WebMvcLinkBuilder linkTo =linkTo(methodOn(this.getClass()).retrieveAllUsers());
    model.add(linkTo.withRel("all-users"));

    return model;
}
아래와 같이 포스트맨 결과를 받을 수 있는 것을 확인할 수 있다.

REST API Documentation을 위한 Swagger설정

0) 인강에서는 아래와 같이 설정하라고 했지만 안됨(그래서 아래에 내가 한 방법을 작성해봤다)
<dependency>
   <groupId>io.springfox</groupId>
   <artifactId>springfox-swagger2</artifactId>
   <version>2.9.2</version>
</dependency>
<dependency>
   <groupId>io.springfox</groupId>
   <artifactId>springfox-swagger-ui</artifactId>
   <version>2.9.2</version>
</dependency>
나는 아래와 같이 설정을 해야지 정상진행되었다.
1) 먼저 야믈 파일에다가 아래와 같이 설정을 해주고,
spring:
  messages:
    basename: messages

  mvc:
    pathmatch:
      matching-strategy: ant_path_matcher
2) pom.xml 은 아래와 같이 설정을 해야한다.
<dependency>
   <groupId>io.springfox</groupId>
   <artifactId>springfox-boot-starter</artifactId>
   <version>3.0.0</version>
</dependency>
위와 같이 설정을 하면, 또 컨피그 클래스를 하나 만들어 줘야한다.

위와 같이 스웨거컨피그 클래스를 하나 만들어주고, 아래와 같이 타이핑을 해보자.
@Configuration
@EnableSwagger2
public class SwaggerConfig {
    @Bean
    public Docket api() {
        return new Docket(DocumentationType.SWAGGER_2);
    }

}
위와 같이 작성하면, 아래의 두개 uri가 실행되는 것을 확인할 수 있다.
스웨거 UI : http://localhost:8088/swagger-ui/index.html
스웨커 docs : http://localhost:8088/v2/api-docs
스웨거는 지금 스프링의 컨트롤러 기준으로 여러가지 정보들을 보여주게 된다.
아래는 스웨거 ui

아래는 스웨거 docs

스웨거 docs에 정보를 입력하고 싶으면 아래와 같이 작성하면된다.
SwaggerConfig.java
@Configuration
@EnableSwagger2
public class SwaggerConfig {
    private static final ContactDEFAULT_CONTACT= new Contact("shoney Lee", "<http://www.naver.com>", "ddmczp@naver.com");

    private static final ApiInfoDEFAULT_API_INFO= new ApiInfo("Awesome API Title", "My User management REST API service", "1.0",
            "urn:tos",DEFAULT_CONTACT, "Apache 2.0", "<http://www.apache.org/licenses/LICENSE-2.0>", new ArrayList<>());

    private static final SetDEFUALT_PRODUCES_AND_CONSUMES= new HashSet<>(
            Arrays.asList("application/json", "application/xml")
    );

    @Bean
    public Docket api() {
        return new Docket(DocumentationType.SWAGGER_2)
                .apiInfo(DEFAULT_API_INFO)
                .produces(DEFUALT_PRODUCES_AND_CONSUMES)
                .consumes(DEFUALT_PRODUCES_AND_CONSUMES);
    }

}
연락처 정보, api 기본정보 등 Docket에다가 추가해서 정보를 넣으면 스웨거 docs에 추가되는 것을 확인할 수있다.
User.java
@Data
@AllArgsConstructor
@NoArgsConstructor
//@JsonFilter("UserInfo")
@ApiModel(description = "사용자 상세 정보를 위한 도메인 객체")
public class User {
    //lombok으로 프로퍼티만 만들어도 됨
    private Integer id;

    @Size(min=2, message = "Name은 2글자 이상 입력해 주세요.")
    @ApiModelProperty(notes = "사용자 이름을 입력해 주세요.")
    private String name;

    @Past //과거만 사용가능
    @ApiModelProperty(notes = "사용자 등록일을 입력해 주세요.")
    private Date joinDate;

    @ApiModelProperty(notes = "사용자 패스워드를 입력해 주세요.")
    private String password;
    @ApiModelProperty(notes = "사용자 주민번호를 입력해 주세요.")
    private String ssn;
}
@ApiModel, @ApiModelProperty 어노테이션을 사용하면 스웨거에서 설명을 볼수있게된다.
REST API Monitoring을 위한 Actuator설정
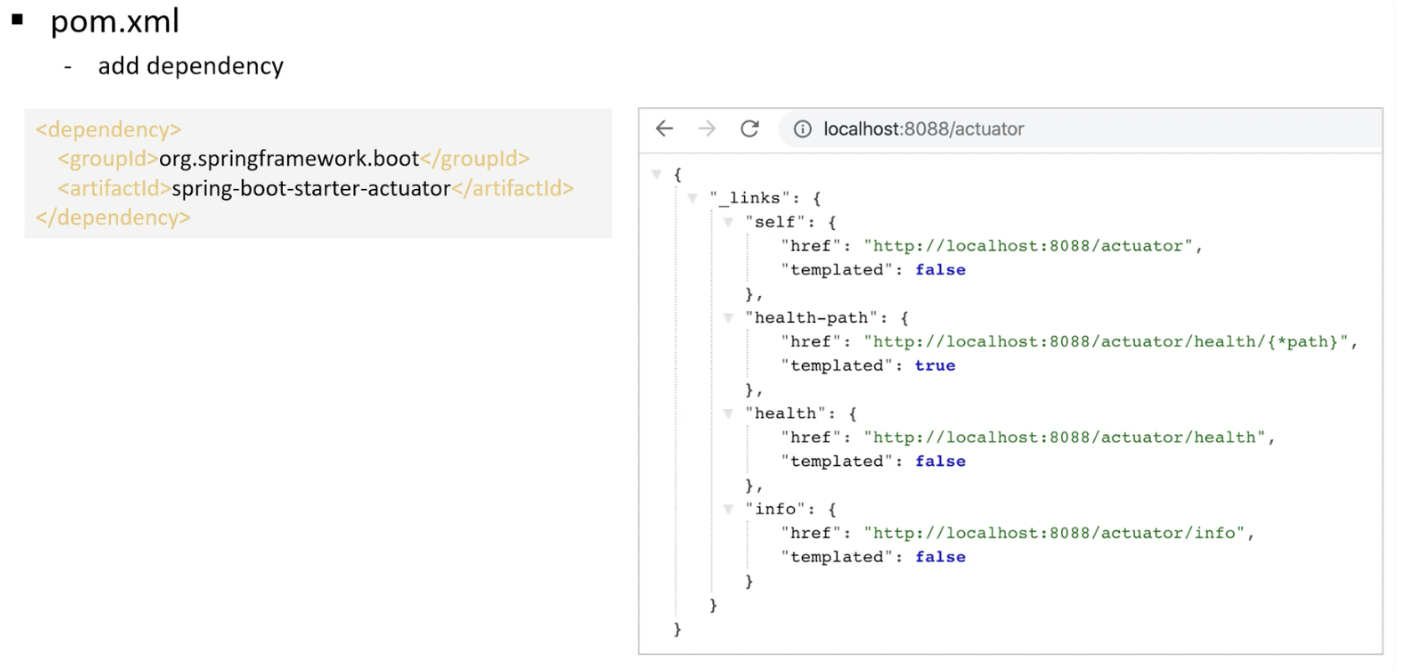
pom.xml 에는 아래와 같이 세팅한다.
<dependency>
   <groupId>org.springframework.boot</groupId>
   <artifactId>spring-boot-starter-actuator</artifactId>
   <version>2.6.2</version>
</dependency>
그리고, http://localhost:8088/actuator 실행하면 작동이 돼야하는데 뭔가 문제가 있어보인다. config 클래스에 아래 소스 코드를 추가해보자.
@Bean
public WebMvcEndpointHandlerMapping webEndpointServletHandlerMapping(WebEndpointsSupplier webEndpointsSupplier, ServletEndpointsSupplier servletEndpointsSupplier, ControllerEndpointsSupplier controllerEndpointsSupplier, EndpointMediaTypes endpointMediaTypes, CorsEndpointProperties corsProperties, WebEndpointProperties webEndpointProperties,
                                                                     Environment environment) {
    List<ExposableEndpoint<?>> allEndpoints = new ArrayList();
    Collection<ExposableWebEndpoint> webEndpoints = webEndpointsSupplier.getEndpoints();
    allEndpoints.addAll(webEndpoints);
    allEndpoints.addAll(servletEndpointsSupplier.getEndpoints());
    allEndpoints.addAll(controllerEndpointsSupplier.getEndpoints());
    String basePath = webEndpointProperties.getBasePath();
    EndpointMapping endpointMapping = new EndpointMapping(basePath);
    boolean shouldRegisterLinksMapping = this.shouldRegisterLinksMapping(webEndpointProperties, environment, basePath);
    return new WebMvcEndpointHandlerMapping(endpointMapping, webEndpoints, endpointMediaTypes, corsProperties.toCorsConfiguration(), new EndpointLinksResolver(allEndpoints, basePath), shouldRegisterLinksMapping, null);
}

private boolean shouldRegisterLinksMapping(WebEndpointProperties webEndpointProperties, Environment environment, String basePath) {
    return webEndpointProperties.getDiscovery().isEnabled() && (StringUtils.hasText(basePath) || ManagementPortType.get(environment).equals(ManagementPortType.DIFFERENT));
}
그리고 다시 http://localhost:8088/actuator 를 실행해보면, 아래와 같이 나오는 것을 확인할 수 있다.

저기에서 헬스로 들어가보면,
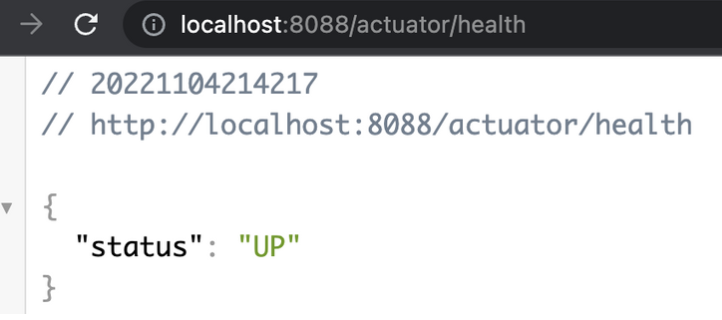
상태가 업으로 조회된다.
야믈파일에 아래와 같이 추가하게 되면 정보를 더 볼수있게된다.
management:
  endpoints:
    web:
      exposure:
        include: "*"

HAL Browser
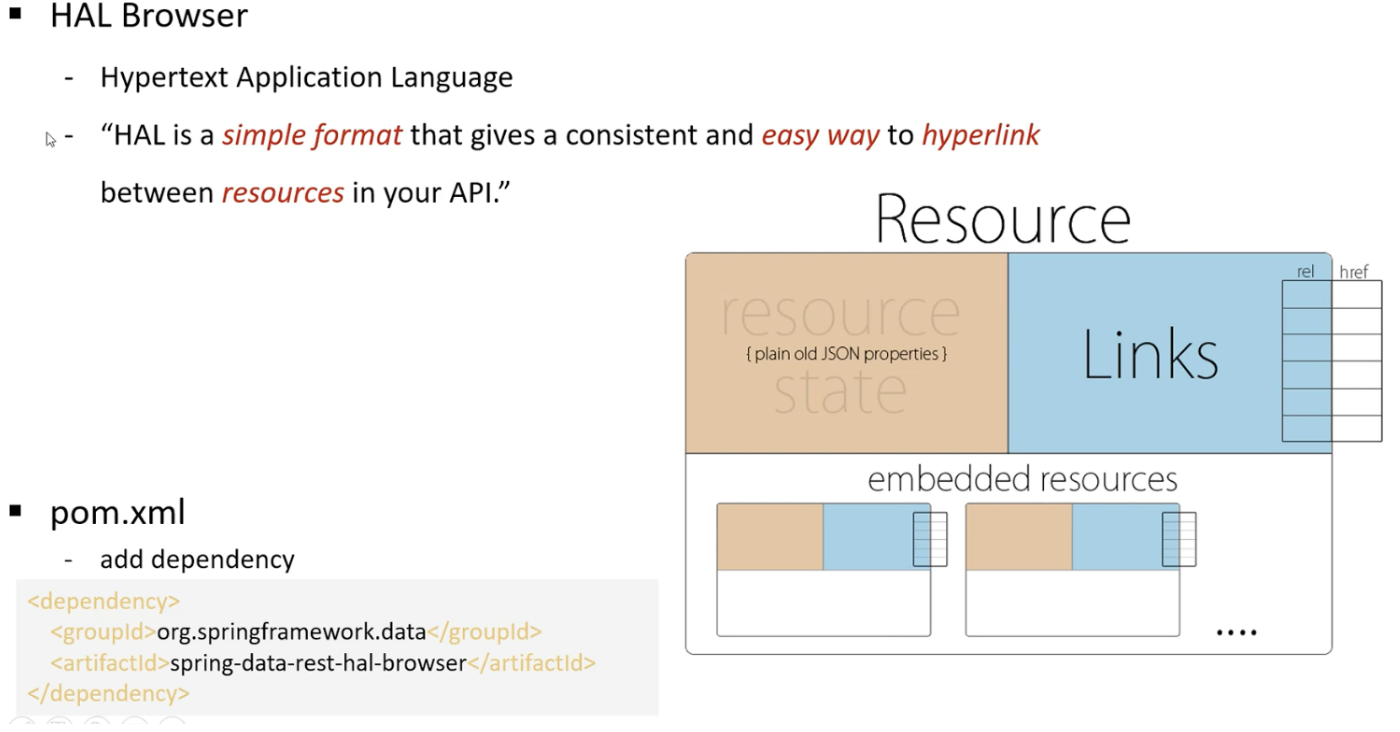
http://localhost:8088/ 로 접속하면 아래와 같이 HAL Explorer가 나온다.

actuator를 입력하고 go를 누르게 되면 아래와 같이 조회된다.
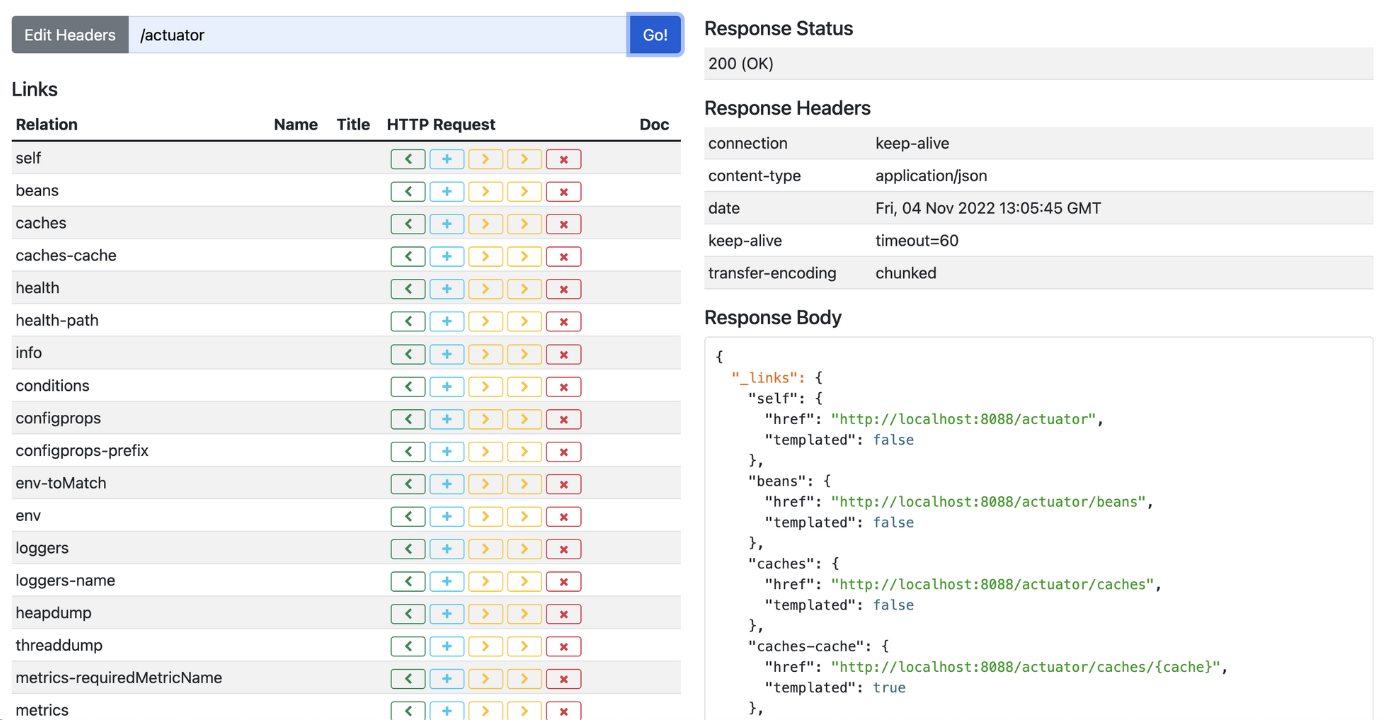
그중에 metrics로 들어가보자.

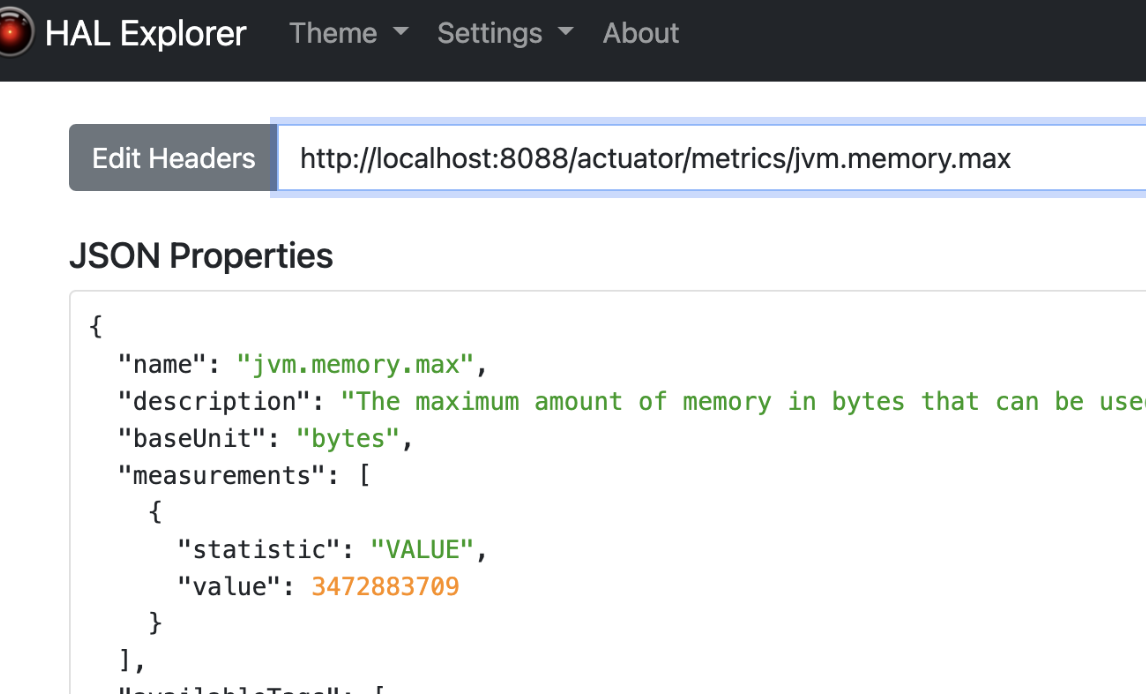
어떤 항목이 있는지 찾아보면 아래와 같은 설정을 확인할 수 있다.

해당 uri로 들어가면 아래와 같이 맥스 값을 확인할 수 있다.
Spring Security

pom.xml에는 아래와 같이 세팅한다.
<dependency>
   <groupId>org.springframework.boot</groupId>
   <artifactId>spring-boot-starter-security</artifactId>
</dependency>
yml파일은 아래와 같이 사용자와 암호를 입력한다.
spring:
  security:
    user:
      name: shoney
      password: 1234
그리고 그냥 포스트맨에서 기존에 사용했던 서비스를 호출해보면, 401 에러 상태 코드로 나오는 것을 확인할 수 있다.

Authorization에서 유저와 패스워드를 입력하면 조회가 가능하다.

그런데 매번 yml 파일에 회원과 패스워드를 입력할 순 없으니 아래와 같은 과정을 한번더 거치면 된다.
SecurityConfig.java 클래스를 하나 추가하고 아래와 같이 WebSecurityConfigurerAdapter를 상속받아 사용하면된다.

@Configuration //스프링 부트가 기동하면서 설정정보를 같이 로딩함
public class SecurityConfig extends WebSecurityConfigurerAdapter{
    @Autowired
    public void configureGlobal(AuthenticationManagerBuilder auth)
        throws  Exception {
            auth.inMemoryAuthentication()
                    .withUser("shoney2")
                    .password("{noop}test1234") //인코딩 없이 사용할수 있도록 함
                    .roles("USER");

        }

}

'Back-end > Spring' 카테고리의 다른 글
| [Spring] 컴포넌트 스캔 @ComponentScan (0) | 2022.11.07 |
|---|---|
| [Spring] Java Persistence API 사용 (0) | 2022.11.06 |
| [Spring] RESTful Service 기능 확장 (0) | 2022.11.06 |
| [Spring] User Service API 추가 (0) | 2022.11.06 |
| [Spring] Spring Boot로 개발하는 RESTful Service (0) | 2022.11.06 |